How To Register a Used Tesla on the App (in 10 minutes)
After a four month long “sales process” with Vroom, I finally received my registration for my 2018 Tesla Model 3.
This meant I finally had the necessary piece of paper that would allow me register my used Tesla on the Tesla app. Soon, the key card I’ve been using lock and unlock my car would relegated to an emergency backup, nothing more.
Honestly, coming off the experience I had with Vroom, I was worried that this too was going to be a long arduous process. Thankfully, I was wrong!
It took me less than 10 minutes to register my used Tesla through Tesla’s website and 5 days later I received a confirmation that I was all set.
In this article I’m going to walk you through, step by step, how you can do the entire registration online quickly and easily.
Secure Your Registration
If you’re buying your car from a local dealership this will be pretty fast and pretty straight forward. It took me roughly three months to get mine.
You will need your registration (you’re going to upload a picture of it in a minute) to be able to connect your Tesla to your account.
Set Up a Tesla Account
First things first, once you have your registration, you need to setup a Tesla account. I did this on my phone initially when I first got my car thinking (incorrectly) that I’d be able to start using the app right away.
But, you can also set up your account online as well. It’s a very basic account setup process. Takes 30 seconds max.
Add Purchased Car From Third Party
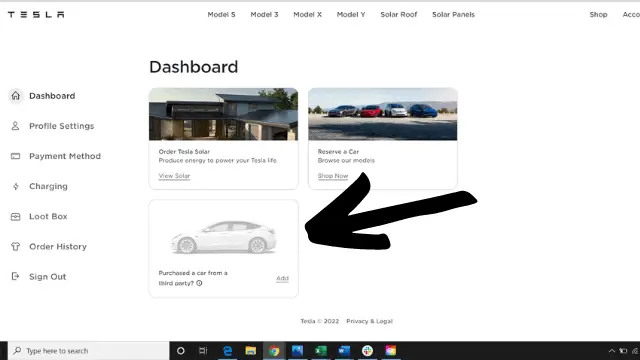
Log in to your account on a desktop computer.
Once you’re logged in, right on the dashboard you’ll see an icon for ‘Purchased a car from a third party?’
Click that icon.
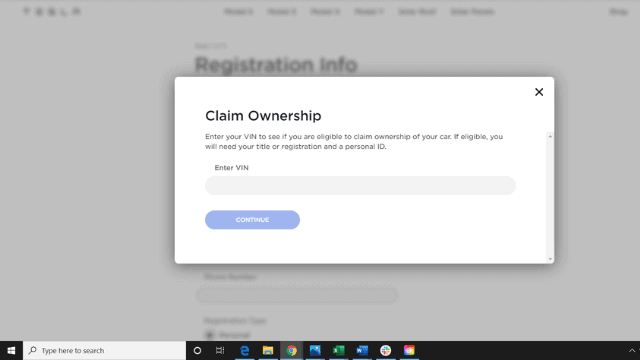
Next, claim ownership by entering your Tesla’s VIN. This can be found on your registration.
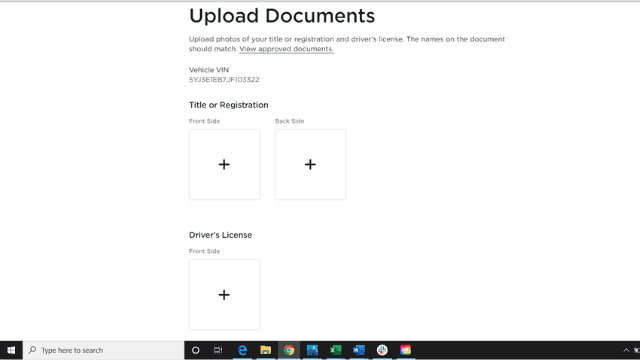
Now you’ll need to upload your documents.
Take a picture of title or registration, front and back, along with a picture of your driver’s license. Email those pictures to yourself, download them to your computer and then upload them to your account.
For what it’s worth, the back of my registration is completely blank and it still worked fine.

Next you’ll be asked to change the name of your car. I took a quick pic of my computer screen so I’d have the directions handy and walked out to my Tesla.
Just follow the directions as follows:
- Go to Controls
- Tap Software
- Change name of car to (whatever name it gives you)
- Tap Save
Once you’ve changed the name of the car (takes less than a minute), go back to your computer and click ‘Next’.

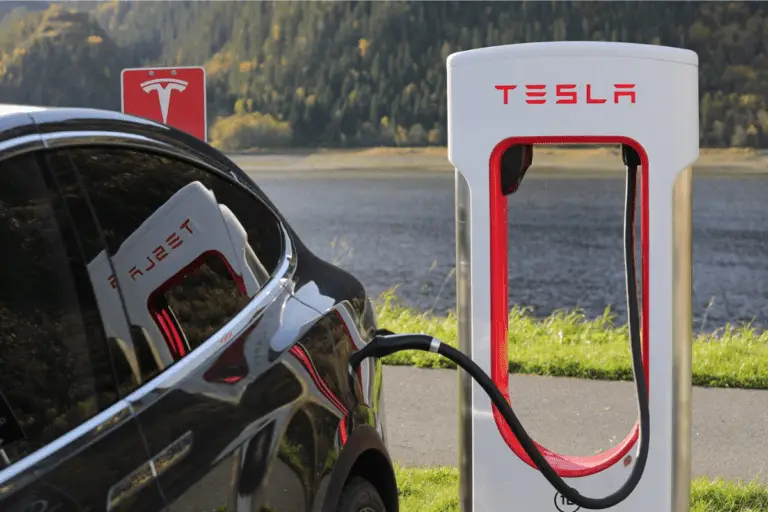
Now you can set up your Supercharging payment method. Having this saved on your Tesla account will allow you to charge as a Tesla Supercharging station. (Supercharging stations do not have any means to accept payment)
You can skip this step and set it up later.

That’s it!
The confirmation message you receive next says essentially that your documents are being reviewed and it could take 3-5 days to add your car.
Your Model 3 Has Been Added to Your Account
That was the confirmation email that I received 5 days later.
I then restarted my Tesla app and after swiping to key card to sync with my phone I was done.
The whole process (minus the five day wait of course) took me less than 10 minutes. Could not have been easier or more seamless. Maybe I got lucky by not running into any issues, but it was one an absolutely painless process.
Final Thoughts
Turns out the stories I had read about it being a pain in the rear to setup a used Tesla are maybe a thing of the past. Once you have your registration in hand, it’s really quick and really easy.
I hope this article helps guide you through setting up your Tesla and it’s as simple for you as it was for me!
